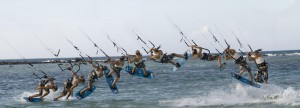
Unhooked Front To Blind Ole
There are a few takes on the front to blind, powered, unhooked, hooked, sent kite, you name it and it’s probably likely. We’re adding the unhooked Ole to the list as it serves a couple of purposes. Firstly it does allow you to go for and learn the blind with a slightly higher kite. Secondly on a big lefty kite in light winds, you will often need to have the kite a bit higher and with the resultant upward pull on the bar “Oleing” out is a health conscious option – oh yes and it does have a different look and feel to a standard bar pass ending. Before you attempt this we’d suggest you can pop front roll, and preferably relay to blind, but if you’ve got the hooked version down then this is a mere step away. Following are a few points worth more than a moment’s consideration.
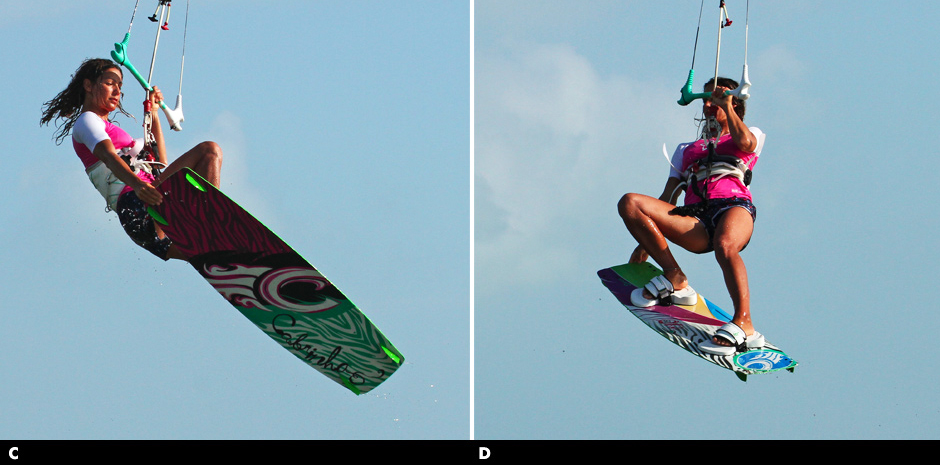
- Take off, pause and rotate Pic A.
As with all things unhooked and popped we’ll assume that you’ll have the bar trimmed correctly, hands centered and approach with good speed before bearing off with your weight back to unhook, dropping low and edging hard into your pop, stamping hard to get the height without a cheeky kite send. If you use your kite you’ll lose forward momentum and the landing will be difficult to pull off.
For extra lift when learning you can have your kite positioned higher, just above 11 or 1 o’clock – but don’t move it up. Here the rider has her kite parked at 11 o’clock and has just popped hard to get up off the water. What’s clear to see is that the rider has not yet started her front rotation; she is still looking forward to where she’s going. You too must separate the movement, even if only by a fraction of a second, but you need to pop before throwing your head and shoulders down and around. As a result you’ll get the height, if not you’ll be diving yourself down into the water and onto your back.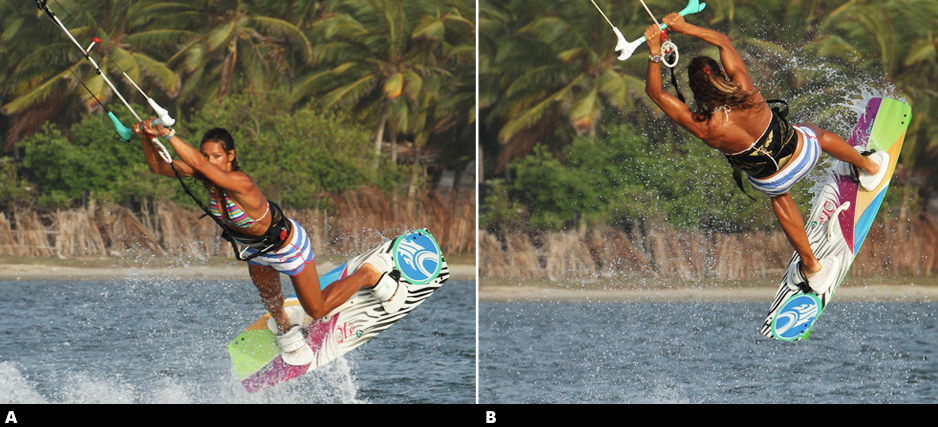
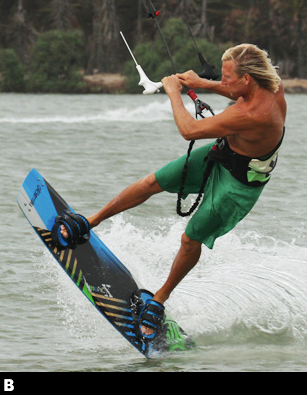
- Front Hand Pic B.
Whilst rotating around, especially if you have the kite high, it will be very tempting to lean on the back hand, and also very natural to have pulled on it whilst edging to pop. Therefore as you spin around it is very good form to keep applying a bit of pressure onto your front hand as this will both stop the kite from floating up above you, and it will keep the kite moving forwards, which will make the landing easier as you’ll have momentum. The rider is only just into her rotation but she is already “leaning” on her front hand. This means that when she finishes her rotation she’ll be able to pull herself towards the bar to throw the blind – if you end up hanging under the bar you can only spin to blind, which won’t offer you any consistency.
- Look Pic C.
We’ve said this before but whether it be a hooked front to blind or an S-bend pass the principal is always the same, another very brief pause between finishing your rotation and throwing the blind. This prevents you from over rotating and you have much more chance of keeping the kite in the air, rather than releasing one arm and starting the mother of all down loops.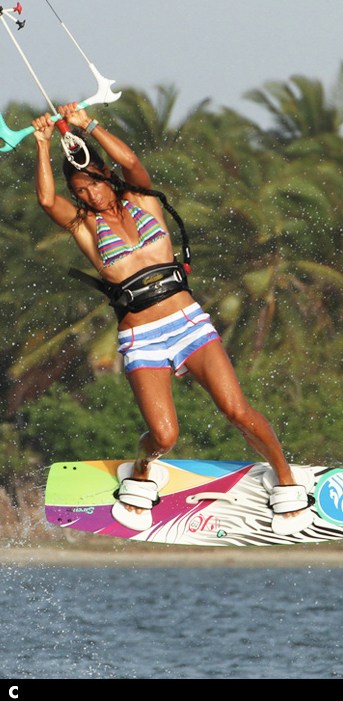
Here the rider has rotated the full 360° and is focused again on where she’ll land. This momentarily slows her down, almost pauses the rotation, enabling her to set up for the blind. If not she would be spinning under her kite. From here she can now pull on the bar hard with both hands and throw the blind. With her head, hands and bar leading the rider can throw the blind and swing her legs through to turn far enough for the landing.
- Landing Pic D.
Landing blind for an Ole or pass needs to be flat on the board, downwind, not on an edge across the wind. This way you’ll be moving toward the kite and therefore there won’t be any tension on the lines.
Sc bearing away into the move is important, as this leads to a more downwind landing, and pulling hard before committing to the blind will also help. In the photo the rider’s board is off downwind so her momentum will keep her moving towards the kite. Now what differentiates an Ole from a surface pass here are the position of the rider’s body and her bar. The rider is standing upright over the board with her head high, not bent over double, and she is holding her bar high above her on an outstretched arm. This position is the perfect set up to an Ole.
- The Ole Pic E.
Firstly let’s remember what an Ole is. You will be moving the hand that is holding the bar, across, upwind of your head and shoulders to the other side of your body, from where you’ll be able to continue riding, but now toe side rather than blind.
That’s all it is, you’re not trying to turn the board or slide it around to bedside. It’s an upper body movement to get the bar across to the direction of travel and no pass is required. You can see in the photo that because she is travelling towards the kite the rider can push the bar upwind of her and then simply move her hand across in front of her face – now the bar is the same side of her body as the kite and the natural order of things are restored.
- The Finale Pic F.
You have a few options to finish things off, and regardless of what you do it’s a good idea to get both hands back on the bar so that you get control of the kite. Continuing on toe side shows good control, and will certainly confuse a few onlookers. That said if you land with a lot of power and speed the chances are that you will carve onto your heels, so keep going and ride out in the other direction. Here the rider has pushed the bar across, finished her Ole and is reaching for her bar. She has a lot of weight on her heels and as a result will steer her kite across the window once she has her back hand on the bar and follow it by continuing to carve on her heels.
Top Tips
- Apart from making sure that your popped front rolls are working off pat, the secret is to land blind and yes you’ve guessed it, pause foss split second before attempting the Ole.
- If you rush the Ole you’ll fall backwards or if you really rush the Ole you’ll start to rotate into it before you’ve even landed. So first land, balance and then push the bar.
Common Problems
- Assuming that you can get to blind the main issue will be falling backwards. This is normally a result of leaning back to push the bar across your face, rather than keeping your weight balanced and physically pushing the bar up wind and past.
- If you land on your toes across the wind the lines will tighten and you won’t be able to push the bar without it pushing you back, or you leaning back.
Keystones
- Pop then rotate
- Look and pause
- Pull with both hands then throw
- Land downwind and flat – pause
- Then push the bar upwind and across
Front Loop Grab
It was recently brought to our attention that we had yet to cover one of the first and potentially simpler of front loop (or front roll) variations – the grabbed sent front loop. We’ve talked you through the inversion, the one foot and all manner of transitions and pops, but this issue we’ll set the record straight and deliver an achievable and yet utterly stylish grab which you can add on to your much loved front loop. Adding a grab onto any move that you already have in the bag is a matter of both confidence and making sure that you have the basics right, so we’ll have a look at what is needed to secure a comfortable and safe front rotation whilst enabling the back hand to come off the bar and grab the board.
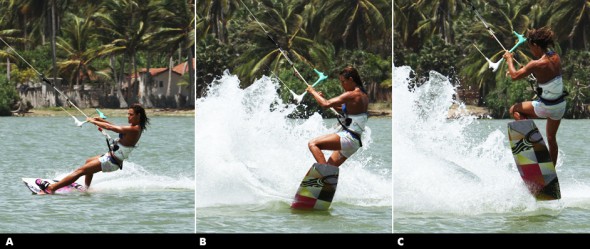
The set up and take off – Pit A.
To learn this, you’ll best keep everything as close to your standard default front as possible, so that you’re adding a grab, not learning a new move. However there are a few points in the set up that you’d do well to follow and we’ll look at the rider as an example. Firstly if you don’t already, you should centre your hands on the bar, so they are resting either side of the centre line. This will stop any unwanted movement of the kite when you grab. With your hands together, sending the kite may seem a little sluggish so be sure to use both hands in a push and pull movement.
Secondly don’t be afraid to send the kite as hard as you normally do. If the kite travels past and behind 12 o’clock, then pulling and supporting yourself on the bar with your front hand won’t result in an immediate diving of the kite.  Thirdly do trim the bar at least down to half way, as this way you are less likely to stall the kite on takeoff and during flight, which hopefully means that you’ll execute an up and down jump rather than flying downwind at speed.
Finally, although you must complete your rotation, it will be easier to grab if you’re not spinning too quickly. So to slow your rotation down just a tad doesn’t use your head to turn you on takeoff but rather just your shoulders and the kick off. You can see the rider is still looking forward as she begins to throw her shoulders down towards the nose of the board and stamp away against her back foot edge.
Grab Prep – Pic B.
The secret to getting a grab in during the short time you have is to go for it early. Looking at the picture you can see that the rider is wasting no time in releasing her back hand and lifting the back of the board up towards her as soon as she takes off. You can also see that The rider is looking towards the tail of the board where she intends to grab it, so she can cirri her hand at the target and bring hand and board together. This would not be possible if she had thrown her head around to look over her back shoulder in order to get the rotation. Having released her back hand so early she can already pull on her front hand a little bit, so long as she did send the kite back past 12 O’clock. In this jump the rider is aiming for a boned out grab, hence she just lifts her back leg, but you’re quite welcome to lift both knees if it feels more stable.
The Grab – Pic C.
The moment of truth! Your easiest and most reachable options for the grab are either the heel side edge by the fin, or the tail itself. It’s a great idea to practice this on the beach without your kite to find out where is most natural for you. Holding a grab, rather than a little tickle is a good game plan, as you’ll have more balance with both hands occupied, so literally grab the board and pull it towards you. Once again to bone it out you can straighten the front leg by pushing your front foot away from you whilst holding the tail in close. In the picture you can see that The rider is still watching her grab, which keeps her rotation slow, and she has the bar held in, which keeps tension on the lines and the kite under control as it gently moves it above her.
If you’ve held the grab and controlled your rotation speed from the take off you will need to initiate and prepare for the landing by completing your rotation. The first and most important ingredient is your head. The rider has turned her head to look around towards where she will land. The old adage of where you look is where you’ll go has never been more true. As your head turns your shoulders will follow, and as long as at least one of your knees is held up so will your hips and board. With your body turning towards the expected landing strip you need to maintain tension in the lines so that you have enough float to get around, and as you can see The rider still has her bar pulled is From this point onwards as you drop slowly down the harder you pull on your front hand, the more the kite will pull you downwind toward a soft landing. Our suggestion here would be to release the grab and get both hands on the bar so that you’re confident with the dive and can then control the power on landing. As you drop the grab, allow your legs to straighten underneath you so that your landing gear is down and that you have a platform to land on. If you keep your knees up, you’ll land with the board in front of you, not underneath you and you’ll be unlikely to smoothly sail off downwind. And if you have boned out the grab remember to lift the front leg slightly as a tail first landing will be a lot more pleasant than a nosedive.
Top Tips
- As already mentioned playing with the grab on land, whether rolling around on the beach, your lawn or in the lounge will train you to grab without too much thought.
- Once you’re on the water start off by throwing down a few front loops without the grab so grab as soon as you take off – if you wait you’ll miss Now check out the sequence and videos – good luck’ that you’re feeling confident.
- Your next step is to go the moment. For a quick tap of the board and then finally hold the grab.
Common Problems
- If you’re struggling to find the time to grab, your rotation is too fast.
- Practice some front loops, still using your rear leg to kick off and your shoulders to dip forward but keep your head perpendicular to your shoulders – this should help. Also go for the
Keystones
- Good edge and positive send
- Kick hard but don’t turn head
- Go for grab early, immediately after take off
- Tom head to complete rotation
- Drop legs and dive to land
Toe side front Roll To blind with Ole
We hope you are grooming well with the aid of our articles and learning every trick carefully. With ever learning day, you are going to be perfectionist in this sport. We always emphasize on doing every trick with right way and right balance, so that your every step of learning should be placed on right path. The trick which we are going to learn today has a better name, but for the moment we’ll stick to the descriptive version. Fundamentally this is a pop trick, but a subtle drifting up of the kite is more than tolerable to get you easiness to learn this trick. For those of you confident with your toe side edge this is a great trick and an inspiring step on from the toe side pop to blind which is a good prerequisite as you need both a decent pop from your toes and the blind that very same side. If this will be doing it first time, let us advise again that it will be easier to pop from your strong toe side to a new and unvisited blind rather than try and pop from your weaker toe side. Popping well from your pinkies is the key here.
The Approach
We need two things in order to pop from your toes, first speed and then a good solid edge. With the board fizzing over the water it’ll be a doddle to get it up and you’ll have momentum when you get it around. Looking at Pic A. you can see that the rider pre pop. First off the rider has his bar trimmed in close so that he can get an aggressive edge and hold the power with two hands without being pulled up onto the board. This way he can turn his head and shoulders away from the kite and stand up onto his toes, hips forward, driving the board between him and the kite. The rider has shifted his weight back on the board ready to pop, as this will help him add tension to the lines by edging harder. However if you need more speed you must keep the front knee bent and the board trimmed flat before shifting your weight back.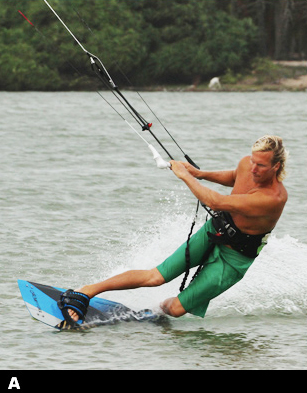
The assumption behind popping is much the same as from heel side – once you have enough speed, carve 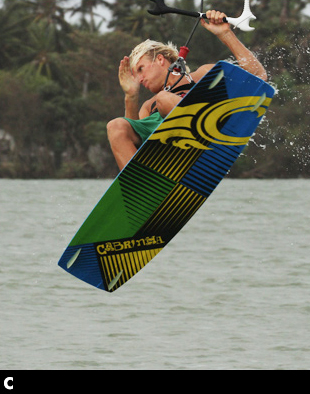 up hard and stamp off the back foot. Though bearing away and then carving up from toe side is no simple task, so for the same sort of effect shifting your weight back will dig the tail in and turn the board upwind on its rocker. The trick is to be quick, shift your weight back and stamp – wait and you’ll lose your speed and nothing will happen. In Pic B. the rider has leant his weight back and simultaneously drifts the kite up slightly from 11 o’clock to give him a bit more lift whilst stamping down hard by explosively straightening his back leg. As he pops up he turns his head and shoulders down and around, initiating the front roll.
The Rotation
The rotation will be very quick as with every front roll from toe side. This is handy, as you’ll need to spin quickly to allow for the extra twist to blind. Aim to keep two hands on the bar until you are coming around the first 360°, as this will keep you more upright and lead to a smoother landing. Looking at Pic C. as Christian reaches this point you can see that he is leading with the head. This is important; as he will know when to initiate the blind once he spots his landing. The rider here also has his knees bent and board up to help encourage a quick rotation and he keeps the bar in for that little bit of extra float. As he focuses on where he’ll land he releases his back hand, turning his head and shoulders down and around under the bar so that he can get his body around to blind whilst the board is leading. This way the board will be beneath him and ready for touchdown.
Throwing Blind
We can see in Pic D. that the rider has “thrown” the blind with the result of turning his head and shoulders down. As he drops his feet and board are leading the way. Whilst turning, he tweaks the kite down by pulling gently on his front hand. This will guarantee a bit more speed and forward momentum for the Ole, and is necessary if you sneak the kite up for takeoff.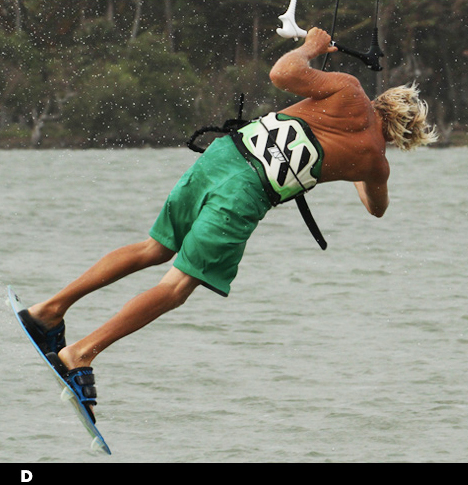
As with all things Ole or pass you’ll need to land blind on a flat board heading at least a tiny bit downwind towards the kite. This way you’ll have no tension on the lines and so the Ole should be a walk in the park. Pic E. the rider lands upright over his flat board, having thrown the blind enough to land slightly off the wind. Try to keep your head up, as this will prevent you from breaking too much at the waist, which can in turn force weight onto your toes and put tension on the lines! If anything you want to be leaning on your heels. Landing this way the lines will be slack and therefore the bar will be close to you, not twisted around leading the way and pulling you over.
Landing upright on a flat board heading towards your kite sets you up perfectly for the grand finale, the Ole. Pic F. Standing over his board the rider can now push the bar upwind and around in front of him, so that the blind miraculously transforms back into toe side. Once the bar is across get both hands back on it, sheet in and ride off with a hefty grin on your face.
Common Problems
- If you’re not getting enough pop from toe side try sailing more across the wind before dropping your weight back and popping.
- If the kite is falling out of the sky as you land make sure that you are both popping hard into the front roll and that you give the bar a tweak forward to keep the kite from drifting too far up.
- If you slide under the kite on landing try throwing your blind more aggressively by turning your head and throwing your free hand around.
- If you’re getting pulled over & catching your heel side edge, you’re not landing enough downwind.
- If you can’t Ole and the kite pulls you over you’re edging on your toes whilst blind, so make sure your weight is on both your feet, biased towards your heels.
Keystones
Nose Grab Front
In today’s world we have made it very easy for everyone to be more skilled in kitesuring. Now information is easily accessible on internet and people paste their experiences in the form of blogs, articles and share the best way to enjoy this sport.
So in continue to that here is our guide to a popped front roll with a Crail or Nose grab thrown into the mix for extra spice. The grab itself is done with the back hand reaching forward and touching, stroking or preferably holding either the nose of the board or as near as possible on the toe side way up near the fin. It goes without saying that you’ll already need a competent popped front to nail this beauty, as the more powered it is performed with, the better the axis of rotation will be and thus all the sweeter the grab will look. Let us remind you of a few vital key moments for a decent popped front whilst also sneaking in the grab.
Coming In
You need to approach in the right way if you want pop, as it will not only help in getting up and off the water, but also the rotation and the landing.
Image A. the rider is perfectly set up for some hefty pop. With her kite parked just below 11 o’clock she pushes the nose of the board off the wind and flexes her back leg to flatten the board, increase speed and move towards the kite, allowing it to drop back a bit in the window. At the sometime she has all her weight, hips, head and shoulders dropped back over and behind the back foot. Her hands are centered and she has her bar trimmed in enough that she can get into this position without pulling too much tension onto the back lines. We always recommend moving your front hand over the middle of the bar, centre line between your first two fingers if you can. This will allow you to keep the power on throughout the move without the kite diving down.
Take Off
Going into a popped front rotation it is all too tempting to drift the kite up and wait for something to happen, which will inevitably lead to a dangly and uncontrolled spin under a very high kite. It’s a mast to keep the kite flying forward and get your height from a very aggressive pop. Breaking the pop and rotation apart, even just by a millisecond will make all the difference. If you concentrate on going up before throwing your head around and shoulders down you will get enough height. If you dive straight into the rotation you’ll not extend up and rather fire yourself down towards the water.
Image B. is showing the rider popping up hard. Having carved rapidly back up onto her edge with her weight still back, she has now stamped down hard, pushing her back leg down against the edge of her board and extending her body upwards for maximum pop. She keeps her front elbow tucked in and bent to prevent the kite from drifting up and the bar is still angled towards the kite as if she were riding. The only give away showing a prospective front rotation is the bending and lifting of the front knee.
When you relies that that you’re on the way up you need to get spinning and think about the grab. You won’t have long in the air so its chop chop. To start the rotation lean the head and shoulders forward, so that you are going with the pop. By lifting the front leg and allowing your body to be kicked up you will start to rotate from the back legs impetus. Turning your head to guarantee spin will help, but if you whip around too quickly it’ll be tricky to get the grab in early enough. As for the grab you need two actions, release the front hand and start to reach forwards, and you must bring the front knee up and across your body to bring the nose of the board within reach.
Image C. the rider is just off the water and she already has her front knee up and across in front of her. She resists the temptation to pull her back leg up and keeps it straight – with it extended the nose of the board will tip even closer to her. She allows her head and shoulders to tip down and forward into the rotation as she fully extends up and keeps the bar pulled in. Her back hand is reaching down towards the already well-positioned board.
The Grab
Early grab will give you two advantages.
- The first is purely aesthetic, you’ll be able to hold it for longer and thus it’ll be more noticeable.
- The second however is more functional – once you have the grab you can pull the board in, making you small and then concentrate on getting around the rest of your front roll.
Theoretically at least, if you get the take off right the grab should fall into place.
Image D. As a result of all the hard work the rider has got a pleasantly satisfying pop, good height and controllable slow rotation. This allows her to get her hand onto the nose area before she has rotated 90°. Keeping the front knee up and releasing the back hand early were key. Keeping the bar in and power on guarantee that she won’t just drop out of her rotation, but will continue to be pulled forward.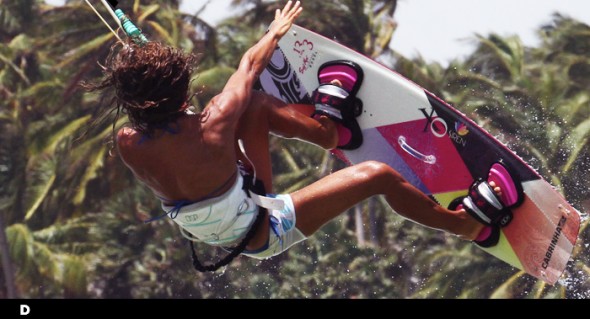
The Money Shot
Once you’ve got the grab, hold it. As stated before, this isn’t just for poseur status, massaging your ego or blatant show boating, but with a solid hold of your board you can pull it in and turn your head and therefore finish your rotation.
Image E. With her grab held the rider turns her head to spot the landing. To speed up her rotation she has pulled both knees up whilst still holding the bar in, keeping the kite moving forward and pulling.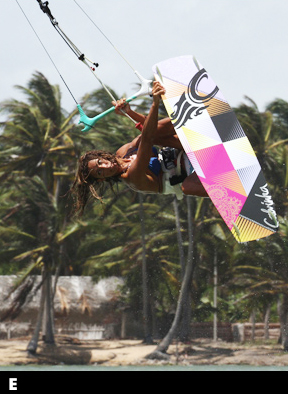
Touch Down
Aim to hold your grab for as long as possible, until you complete the rotation. You’ll find the timing quite natural, as you’ll need to let go to allow your board to drop under you as you start to drop. Assuming you went off the wind in your approach you should come around to a comfortable downwind landing towards the kite, which will kill the power in the kite and make tutu comfortable stomped landing.
Image F. You can see that the rider has released the grab and lets her legs and the board drop down beneath her for a solid reception. She still has pulled in so will land following the kite with her weight squarely over the board.
Top Tips
- A good pop and confident front roll are key, so before throwing yourself up into one of these get warmed and ready with a few two handed front rolls. When you’ve knocked out a few high and controlled ones you’ll be more confident to go for the grab.
Common Problems
- If you’re struggling to reach the grab there are two solutions. Firstly if you can already nose or nearly nose (troll) grab the board in sent jumps or front rolls try popping with the kite higher, or even drift it up a tad
- With a higher kite and a more vertical rotation it will be easier to reach the board. Secondly if you’ve never tried a two grab before and you’re finding it tricky here, revert to getting the body movement right in a sent jump and then a sent front roll. Videos and Sequence for the entire visual path….
Keystones
- Bear away with weight back for god pop
- Extend up fully
- THEN release back hand and start rotation
- Bring front knee up and across
- Hold grab and turn head
Hooked Front Roll
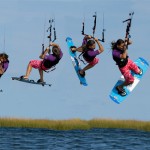
The hooked front roll is harder to perform than the back roll. The trick is however quite simple compared to many others. Here is the steps you should follow to master this trick:
- Come into the trick with even speed and power.
- Keep your kite at 45 degrees and your hand in the middle of the bar.
- Jump off the water, once in the air, tuck your front shoulder and turn your head over your back shoulder.
- Keep your head turned in the direction of the spin.
- Once you see the water, bend your knees and spot your landing.
- Point the board downwind, land and ride away.
Tips! keep your hands in the middle of the bar. Relax, don’t try to spin to hard. At first try sending the kite a little to get some lift.
Unhooked, Front Roll To Blind
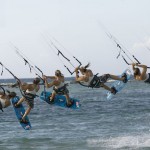
Unhooking and adding a revert to blind can spice up any trick and make you look like you have more game, even a simple front roll becomes something special once you spice it up.
Riding left to right, front foot forward with the kite above 45 degrees, trim the strap to unhook the bar, unhook and ride a short distance to check you have trim spot on.
To make lide easier and to gain an extra rotation time for the landing to blind, send the kite up a little as you pop from the water. Tuck your chin to your right shoulder and look behind you over your right shoulder as you pop to start the rotation.
Half way through the rotation, you should start to spot the landing by looking over your left shoulder. As you come in to land instead of letting the board follow your body round, take your right hand off the bar and swing your arm down towards the water, this will give you enough counter swing to stop your body rotation and land blind.
As you land, bend your knees to take the landing, keep your weight firmly centered over your feet. If you feeling up tp it you can ride out the trick with surfaced handlepass.
Good luck with this cool trick!
Tips! Make sure that you trim correctly to unhook before trying the trick. when landing blind lean forwards and towards your back foot, to help keep the edge.
Front Roll To Toeside
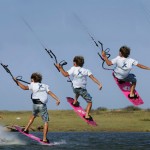
Front Roll To Toeside (inverted handle pass)
Ok, so you are skilled enough to make a normal front roll with a blindfold over your eyes, then this trick hopefully will give you a new challenge! Just follow these steps:
- Start on your heelside edge, elbows in.
- Through your front roll, but with more forward pop as if you are going to rotate over it.
- Once inverted let go with your backhand and start your rotation.
- Pass the handle into your new lead hand.
- Land on your toeside edge.
- set your edge and ride away.
Tips from the coach.
You are adding a 180, so give your self more forward pop to not under rotate.
You’ll be landing with your back hand on the bar, so watch that the kite doesn’t fly back the other way.
Handle to your hips, before you rotate.
Good luck!


